This is Murdoc. He is a Golden Doodle with an appetite for Nerf darts, Nerf balls and … trash.

This picture above is after his surgery to remove a couple of Nerf balls from his intestinal tract. They had completely blocked his output, preventing any input. I hope I don’t need to paint a more vivid picture.
In addition to admonishing the grandkids to NOT leave their Nerfdarts and balls liberally sprinkled throughout the yard, we also had to teach them to always lock the trash can. Why? One day we came home to find, without any prior behavioral change, Murdoc sitting in the middle of all the trash from the kitchen trash can feasting on unknown substances. He was perfectly happy. We were not. Surgeries are expensive, and they are very hard on the dog. He lost a section of his intestine from the previous adventure. He couldn’t afford another loss, and neither could we.
We tried the manual lock on the trash can, but we consistently found that “someone” forgot to latch it, usually when we heard Murdoc lift the lid with his nose and it slipped and slammed alerting us to his transgression. A better solution, not prone to human error was needed. This sent me searching for trash cans with electronic locks. Most were “touchless” and used simple infrared sensors to open the lid. Even those that were touted to be “dog proof” were prone to tip-overs and pillage. Murdoc weighed 80 lbs, so a normal kitchen trashcan is no match for perseverance.
If you can’t buy it, build it, right? So that is what I did. I had a very basic set of requirements.
- I want a latch, not a lift. I still want a second motion to open the trash can completely separate from the locking/unlocking action.
- It needs a specific gesture with a human hand to unlock the trash can. Not just a “warm body” passing over or near the sensor.
- It needs to sense if the lid is left open (such as when it is overfilled) and alarm when left open.
- It must relock automatically once the lid is closed.
The First Prototype
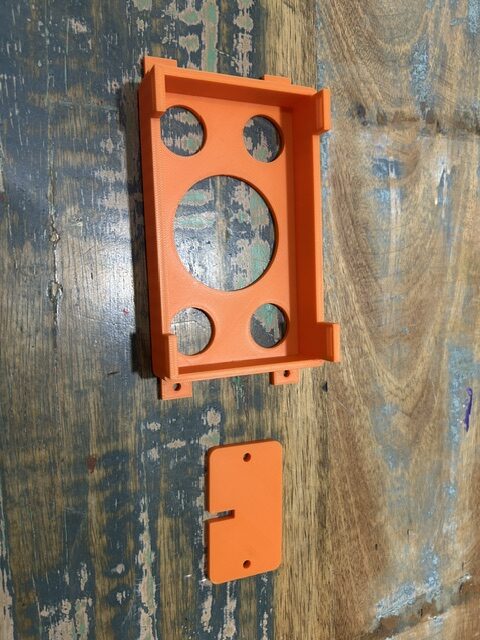
I started very simply. A ball tilt sensor, an infrared motion sensor and a servo to open and close the lock. I tried a linear servo, but it just didn’t have enough newtons to reliably unlock/lock the lid. The hardest part of this first prototype was the locking mechanism. After some research I settled on a scotch yoke (pictured below) to translate the circular motion of a standard servo to a liner motion for a locking pin. Using the pin was needed to ensure the lid stayed locked even in the event of a tip over.
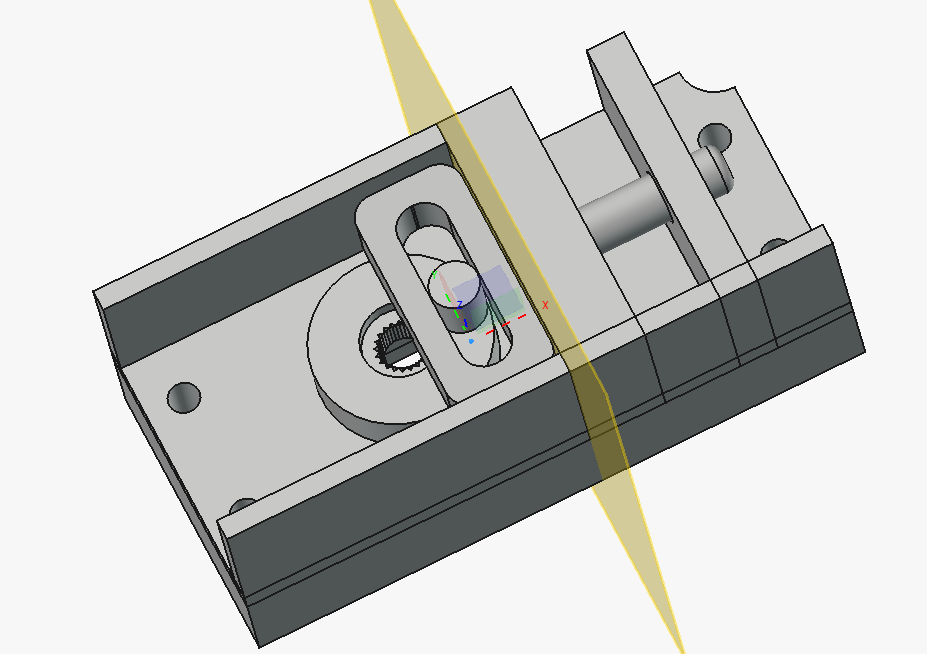
The scotch yoke has the advantage that even if power is lost it remains in its previous position, either locked, or most importantly locked. If something fails it can be forced open by applying steady pressure on the end of the pin.
I tested everything using a breadboard. It looks like my typical mess. The IR sensor is pictured at the top. The tilt sensor is off to the left. The piezo speaker is at the bottom, and the servo is off to the right. I programmed the IR sensor so that it needed three distinct motions within a 5-second period. This was so someone casually passing by (like Murdoc) wouldn’t trigger the open routine. The code relocks the trash can after 10 seconds as long as the sensor idicates that the lid is closed. Otherwise, it alarms until the problem is corrected.
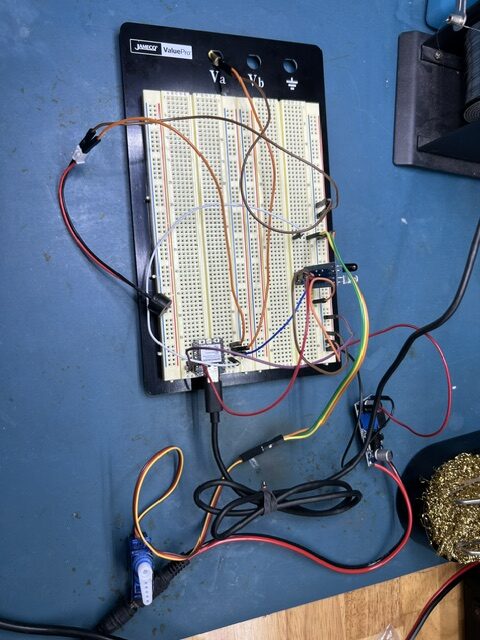
Of course, everything worked like a champion on the desk. But what about in practice? Not so well. The IR sensor was easily confused by changing background light levels. I tried a number of libraries that were supposed to compensate for these changes, but none worked well in my environment. Also, I was not able to get the alignment exactly right for the ball sensor so that it was sensitive enough to alarm if the lid was left cracked (preventing the lid from locking), without being so sensitive as to give false alarms if the trash can was shifted slightly when part of the base was in a low point on the floor tile. The one thing that worked flawlessly was the scotch yoke yoke.
Given the operational data and feedback from my users (my wife and grandkids), I was off to improve the sensors.
Prototype 2
After some research, I decided to go full overkill with a PAJ7620U2 Gesture Recognition Sensor to lock and unlock the trashcan, and a GY-521 MPU-6050 3 Axis Accelerometer as my tilt sensor. You can see the sensor package below along with the main microcontroller board and the servo to control the scotch yoke.
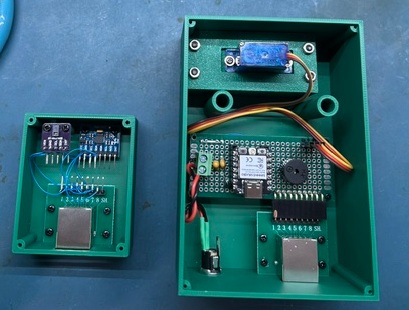
Sensor Package
Both worked extremely well. The accelerometer uses some tricky math to translate linear acceleration into an angle by “measuring how the Earth’s gravity distributes across its three axes.” Fortunately for me, all of the calculations are done internally in the library. I coded the accelerometer to set the zero position when power is applied. This means that even if the floor is unlevel the sensor will still sense that the lid is open and alarm.
I did find the gesture sensor slightly fiddly. It can detect 9 basic gestures. They are Move Up, Move Down, Move Left, Move Right, Move Forward, Move Backward, Circle Counter-Clockwise, Circle Clockwise, and Wave. I wrote some code to just print out what gesture was sensed, and more often than not, a Move Up or a Move Down would register my hand as moving either Forward (toward the sensor) or Backward (away from the sensor). I had to keep a very steady hand to get the other gestures to be consistently recognized. Since the Forward and Backward motions were the most easily performed and recognized, I decided to use a sequence of these motions in a set period of time as my trigger to unlock the trash can. All of my “testers” were able to easily use this motion set to operate the trash can.
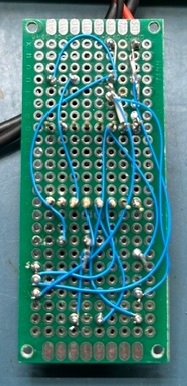
I use a “solder wrap” technique for my prototyping. The bottom of the main board with the microcontroller is shown above. For those connections that have the standard, square wire wrap pins I just use the standard wire wrap technique; strip back the insulation and use a wire wrap tool to secure it to the pin. For through-hole components I do the same thing, except I leave the leads long and once all of the connections are made to a particular lead, I solder the group to the pin for a secure electrical connection. Cheap and cheerful.
The Final Result
Completed Unit
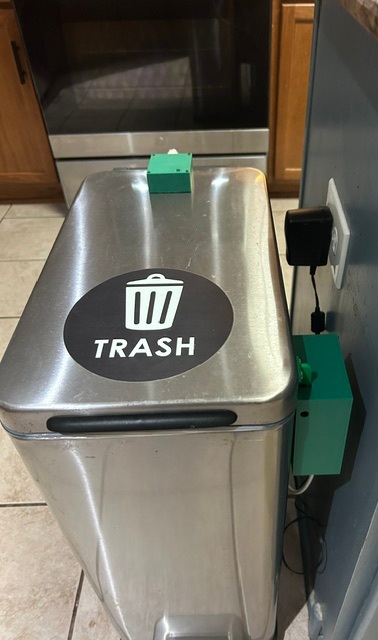
How did it turn out? It worked extremely well. You can see the completed unit above. Since I was carrying the I2C signals from the sensor box to the main lock box (which has the microcontroller) over a long distance I used Cat5 cable, with SDA and SCL lines each in a separate grounded pair to help with noise immunity.
The main components I used are:
- XIAO ESP32C3 Microcontroller – The brains of the outfit
- PAJ7620U2 Gesture Recognition Sensor – Used to unlock the trashcan
- MPU6050 3 Axis Accelerometer – Senses the open/closed position of the lid
- SG90 Micro Servo Motor – Locks and unlocks the trashcan through the Scotch Yoke
- Piezo “Buzzer” – The speaker used to sound the alarm when the lid is left open
- Ethernet Breakout Board – Used to connect the I2C sensors to the microcontroller
If you are interested in building this, or a derivative project you can find the source code, schematic and 3D design files on my TrashControl GitHub website.
Postscript
I didn’t want to bum you out at the start of this post, but unfortunately Murdoc did not survive his major trash feast incident. He seemed fine at first, but he started having gastrointestinal issues while I was working on this project. At first, they were mild and recovery was easy. Right when we thought we were out of the woods (weeks went by with no issues) he started having major issues which warranted a visit to the vet. She found 6 major intestinal blockages, distributed throughout his intestines that were just too complicated for surgery. Unfortunately, we lost Murdoc. I decided to complete this post in the hopes that if you have a Murdoc you may find it useful to prevent your dog or cat from suffering a similar fate.
In Memory of Murdoc, our joyful, faithful friend. We still miss you.
73, Greg, KM5GT